
 Good price
 Professional solutions
 Phone consultation
+370 657 86 751
When fixing various elements to an insulated facade, it is important that the fixing is anchored securely into the load-bearing wall rather than relying on the facade finish or the insulation layer. Long M6 threaded rods and suitable anchors can be used to create a secure fixing point through the entire facade insulation layer.
In this guide, we show step by step how to prepare the fixing points, install the anchors into the load-bearing wall, screw in the M6 threaded rods and prepare them for the element being installed. This fixing method can be used for flag holders and other elements mounted to insulated facades, provided that the selected fixing method is suitable for the specific wall substrate and expected load. Suitable products are available in the Fixing Through an Insulated Facade category.
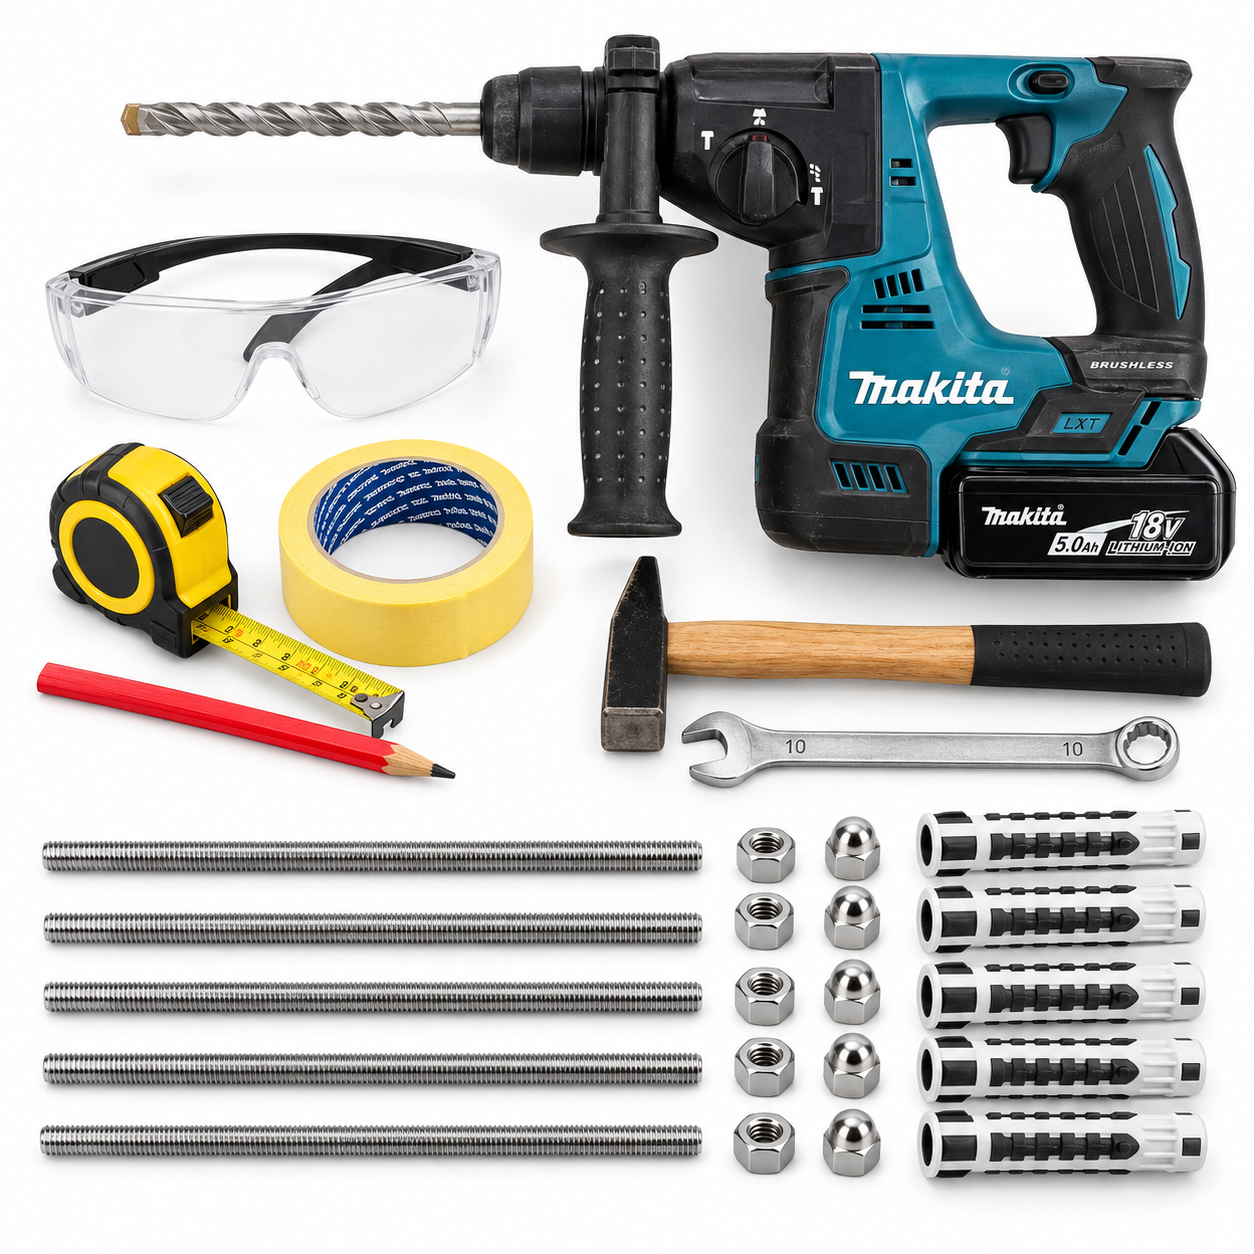
Before starting, prepare a drill with a Ø10 mm drill bit, measuring and marking tools, a 10 mm spanner, a hammer and the required fixing elements. You will also need a flexible exterior-grade sealant to seal the openings around the threaded rods.
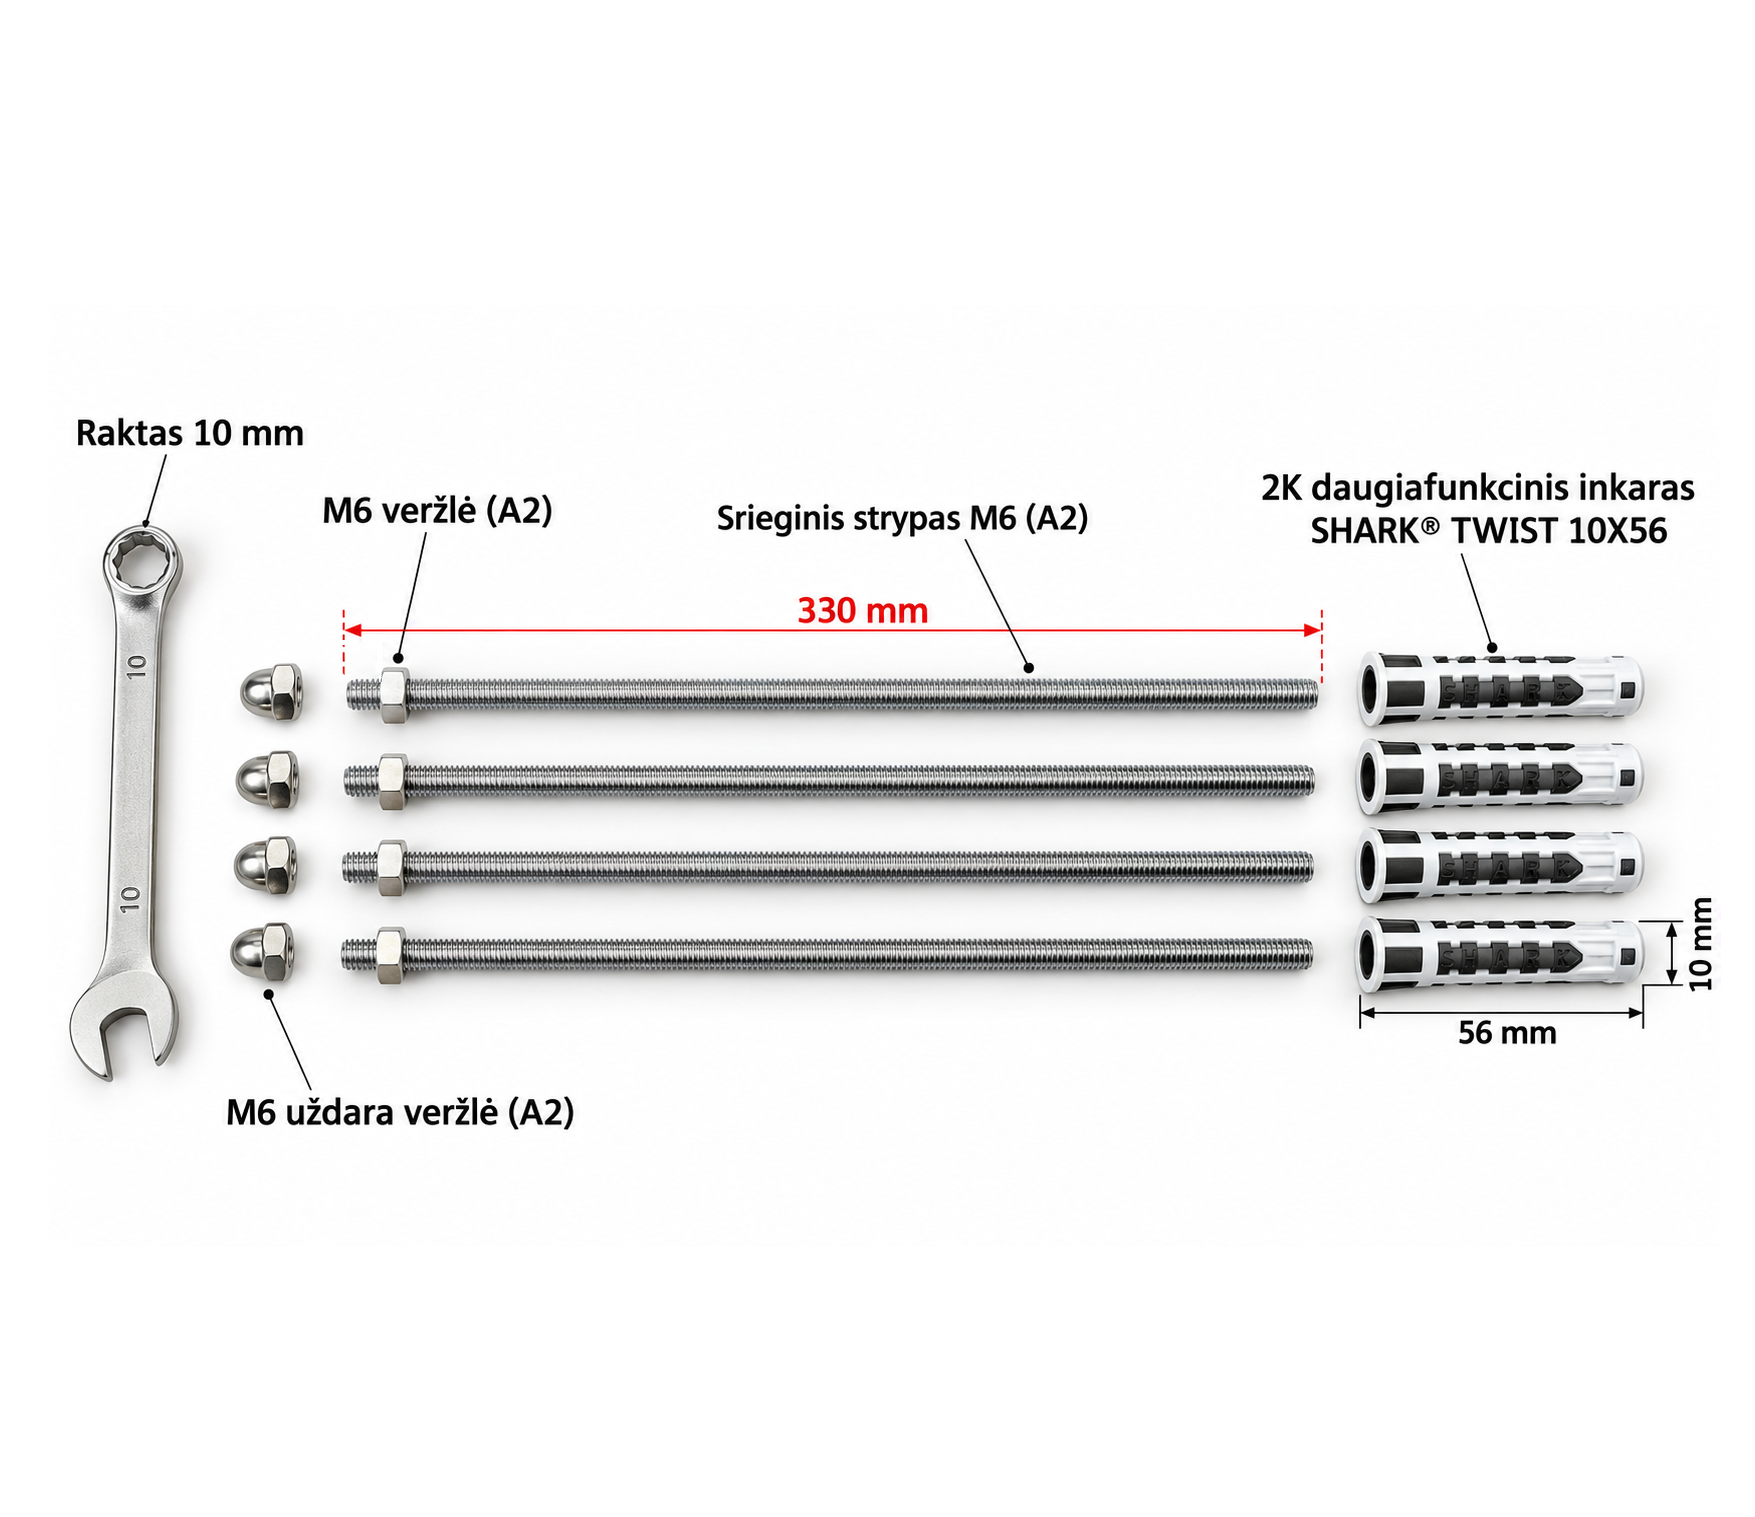
The installation uses A2 stainless steel M6 × 330 mm threaded rods, M6 nuts, M6 cap nuts and SHARK® TWIST 10×56 mm anchors. All these components are available as a ready-to-use INK-330-M6 fixing set for insulated facades. The 330 mm threaded rods allow fixing through a thick facade insulation layer and can be shortened as required when the insulation layer is thinner.
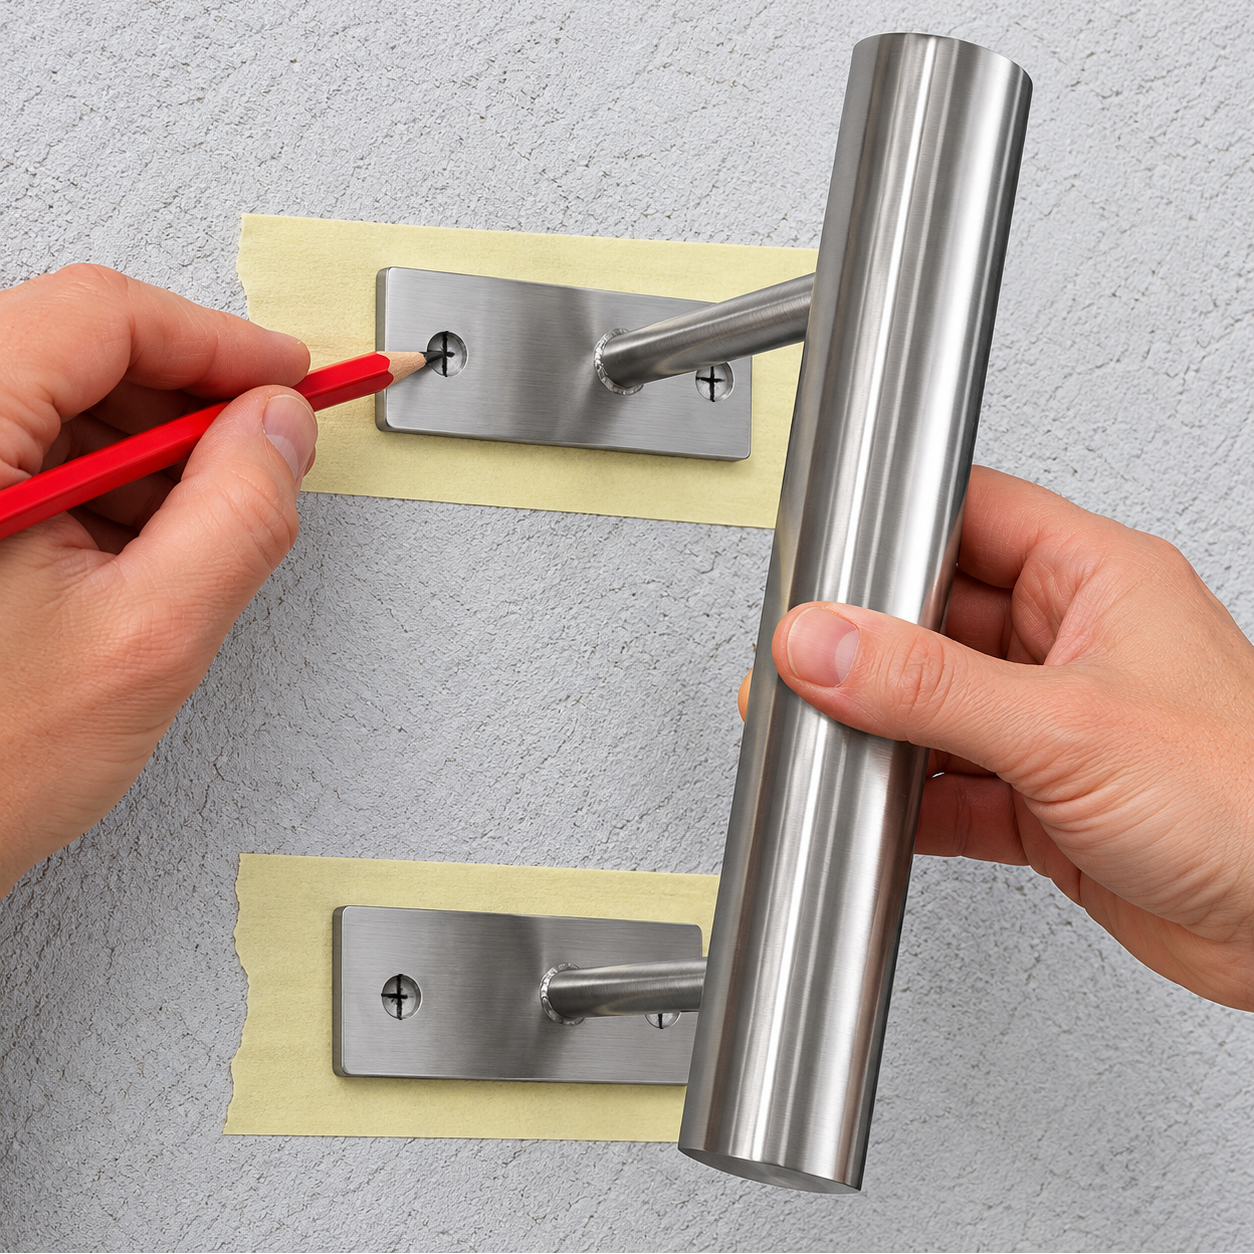
Position the element to be installed against the facade and accurately mark the fixing points. When installing a flag holder, check its position and the distances between the fixing holes once again before drilling.
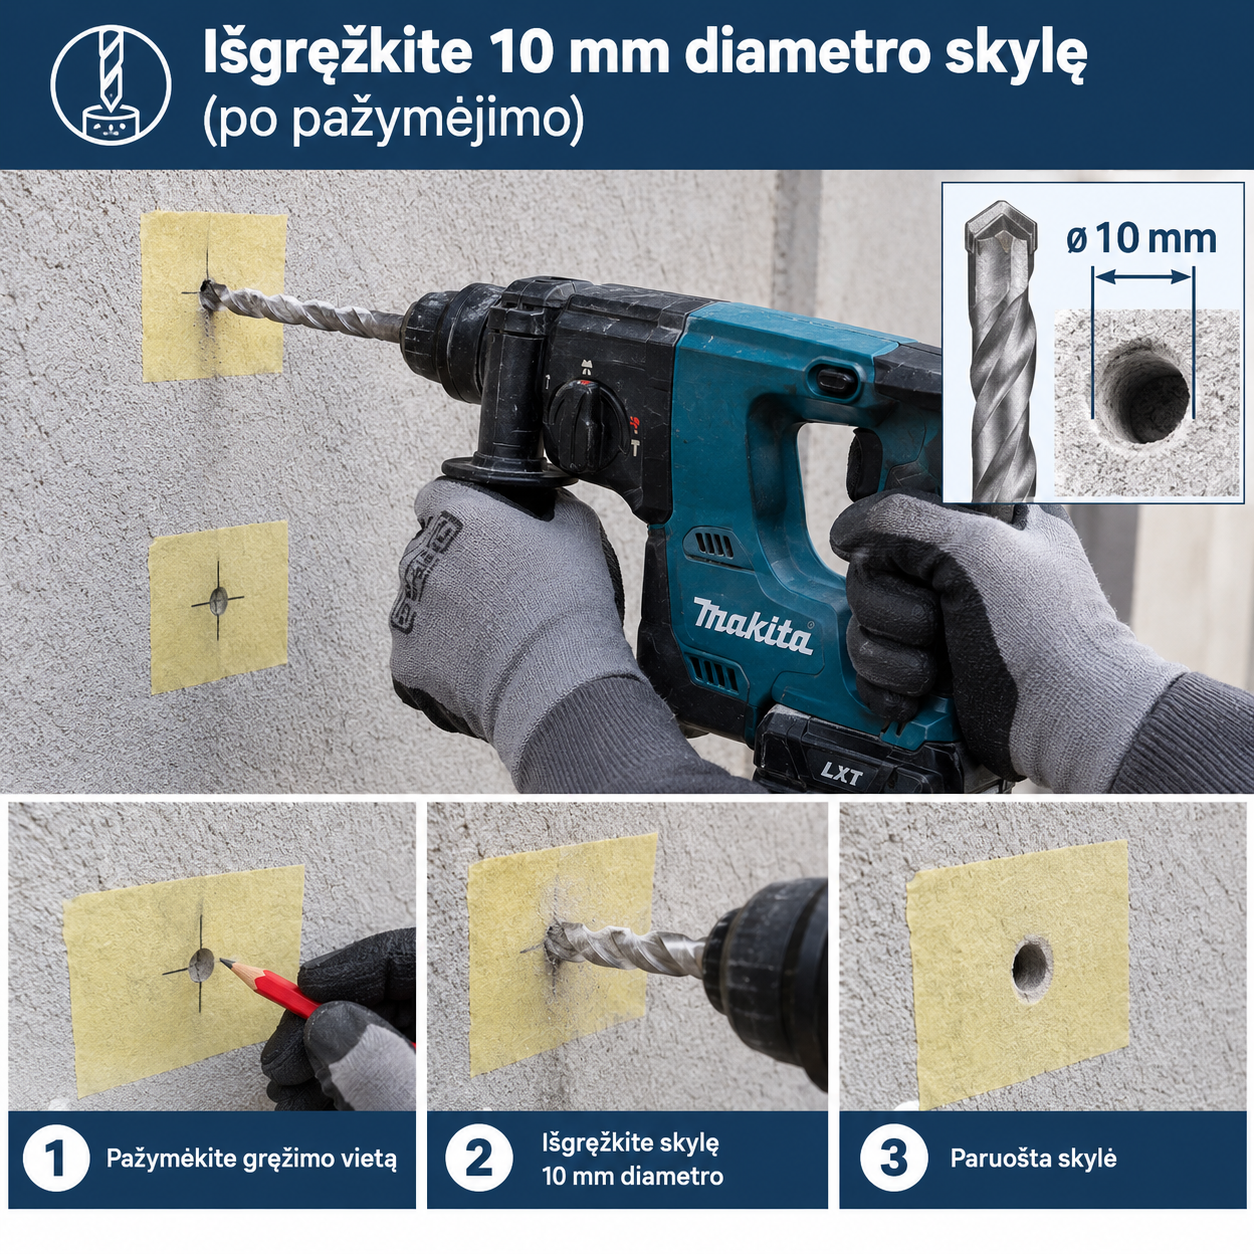
At the marked points, drill with a Ø10 mm drill bit through the facade finish and insulation layer into the load-bearing wall. The hole in the load-bearing wall must be deep enough for the SHARK® TWIST 10×56 mm anchor to be fully inserted into the load-bearing substrate.
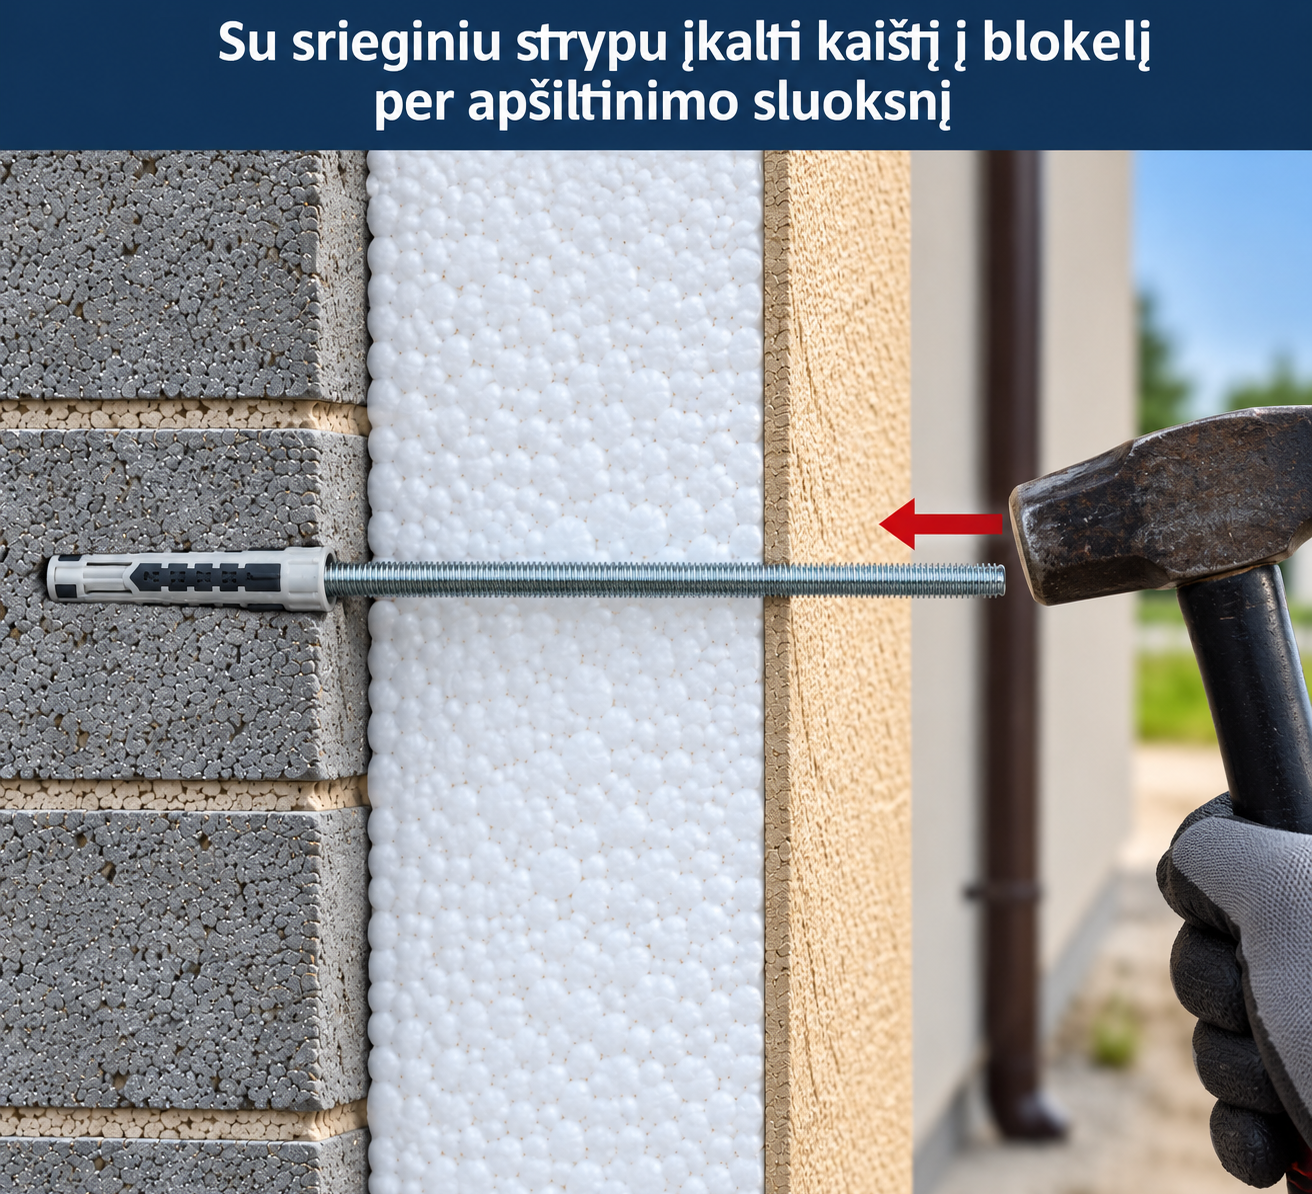
Fit the SHARK® TWIST 10×56 mm anchor onto the end of the M6 threaded rod and use the rod as an installation aid to push or carefully tap the anchor through the insulation layer into the drilled hole in the load-bearing wall. The anchor must be positioned in the load-bearing wall, not in the facade insulation layer.
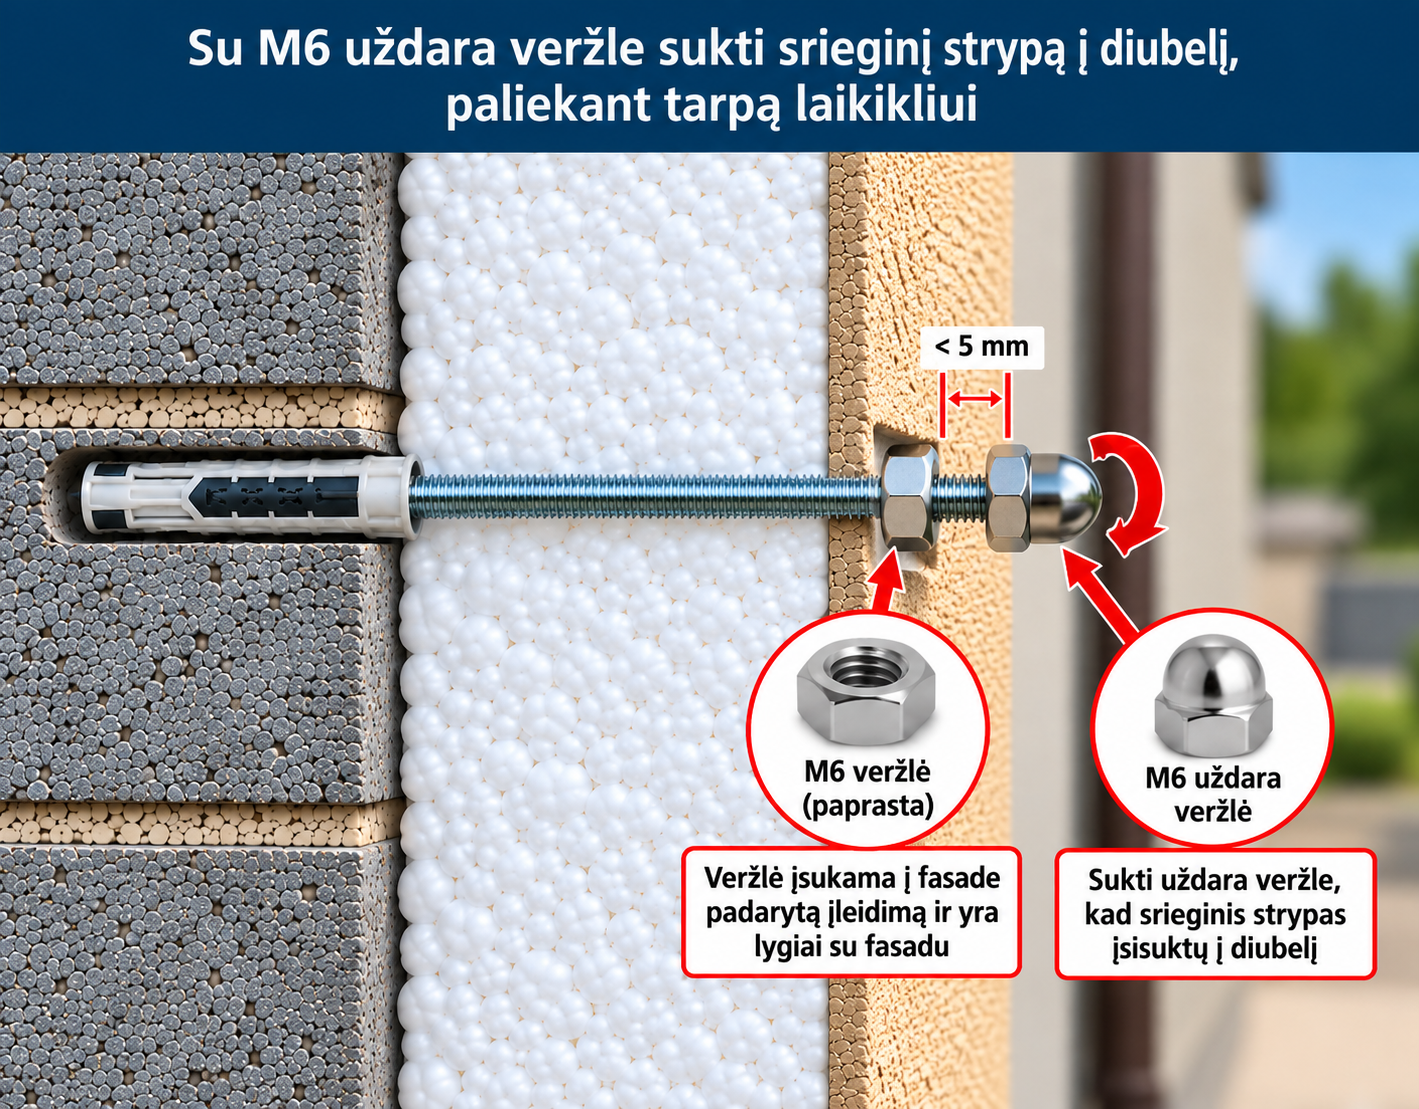
Screw a standard M6 nut and an M6 cap nut onto the outer end of the threaded rod. Using a 10 mm spanner on the cap nut, screw the threaded rod into the anchor. Position the standard M6 nut in the recess made in the facade so that its outer face is flush with the facade surface. Leave a gap of up to 5 mm between the standard M6 nut and the cap nut – this space will later accommodate the holder or other element being installed.
Before installing the holder, carefully seal the area around the threaded rod at the facade surface using a flexible exterior-grade sealant. Proper sealing helps prevent rainwater and moisture from entering the facade insulation layer through the fixing opening.
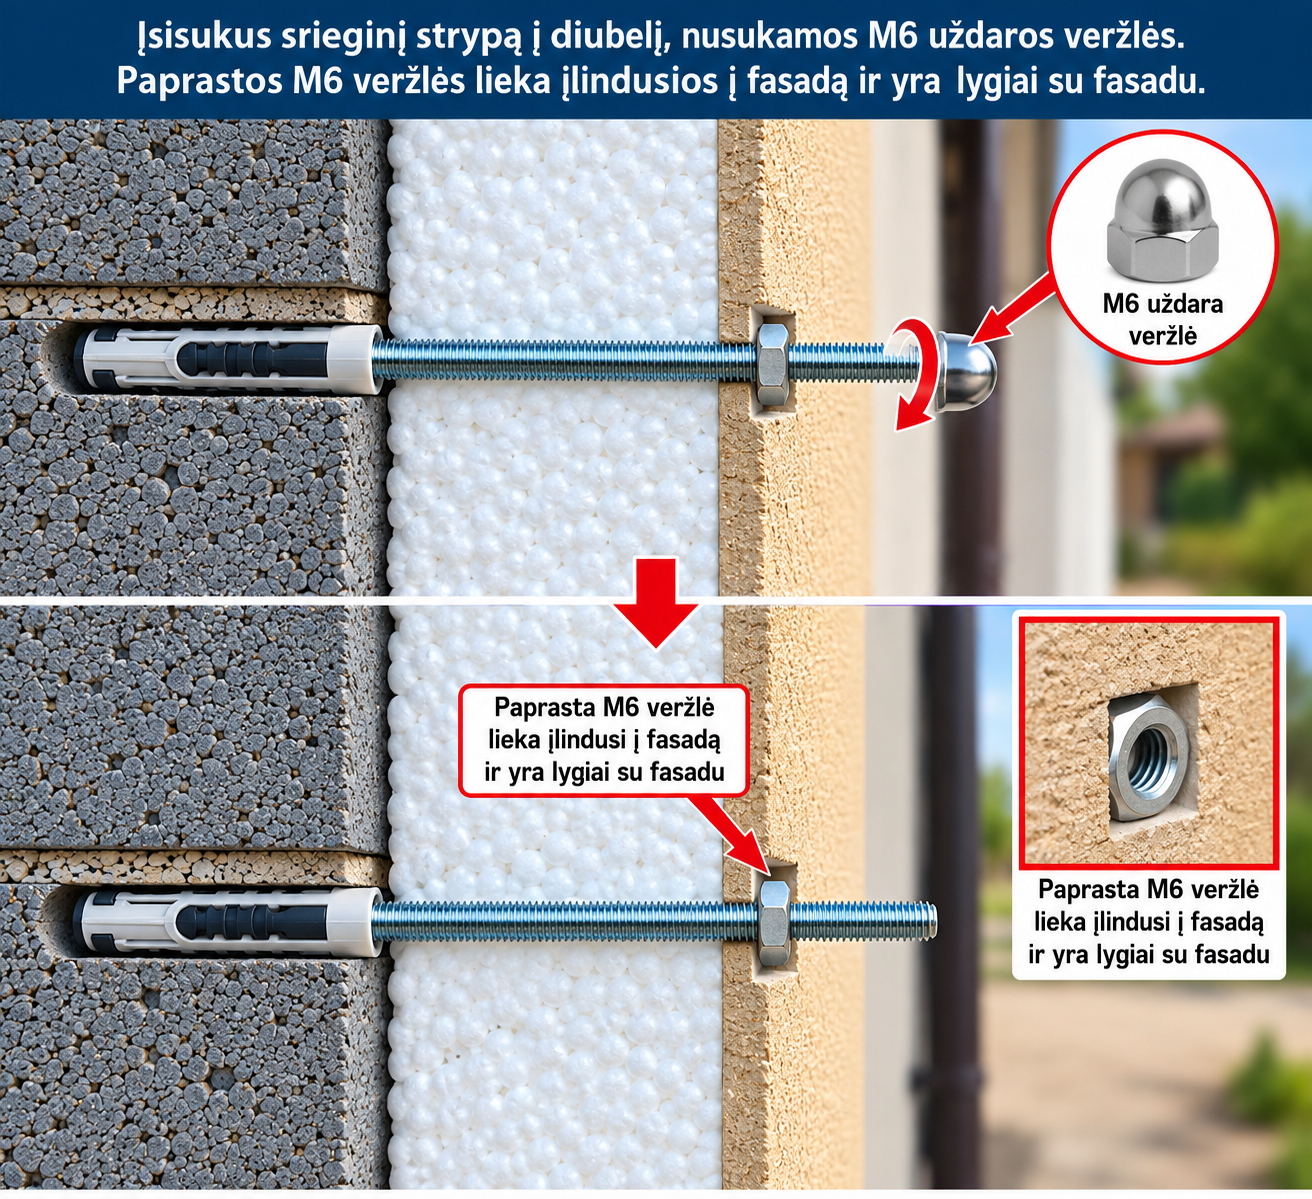
Once the threaded rods are securely screwed into the anchors and the fixing points have been sealed, remove the M6 cap nuts. Leave the standard M6 nuts recessed into the facade and flush with its surface. These nuts provide a solid support for the element being installed and help prevent the facade insulation from being compressed when the fixing is tightened.
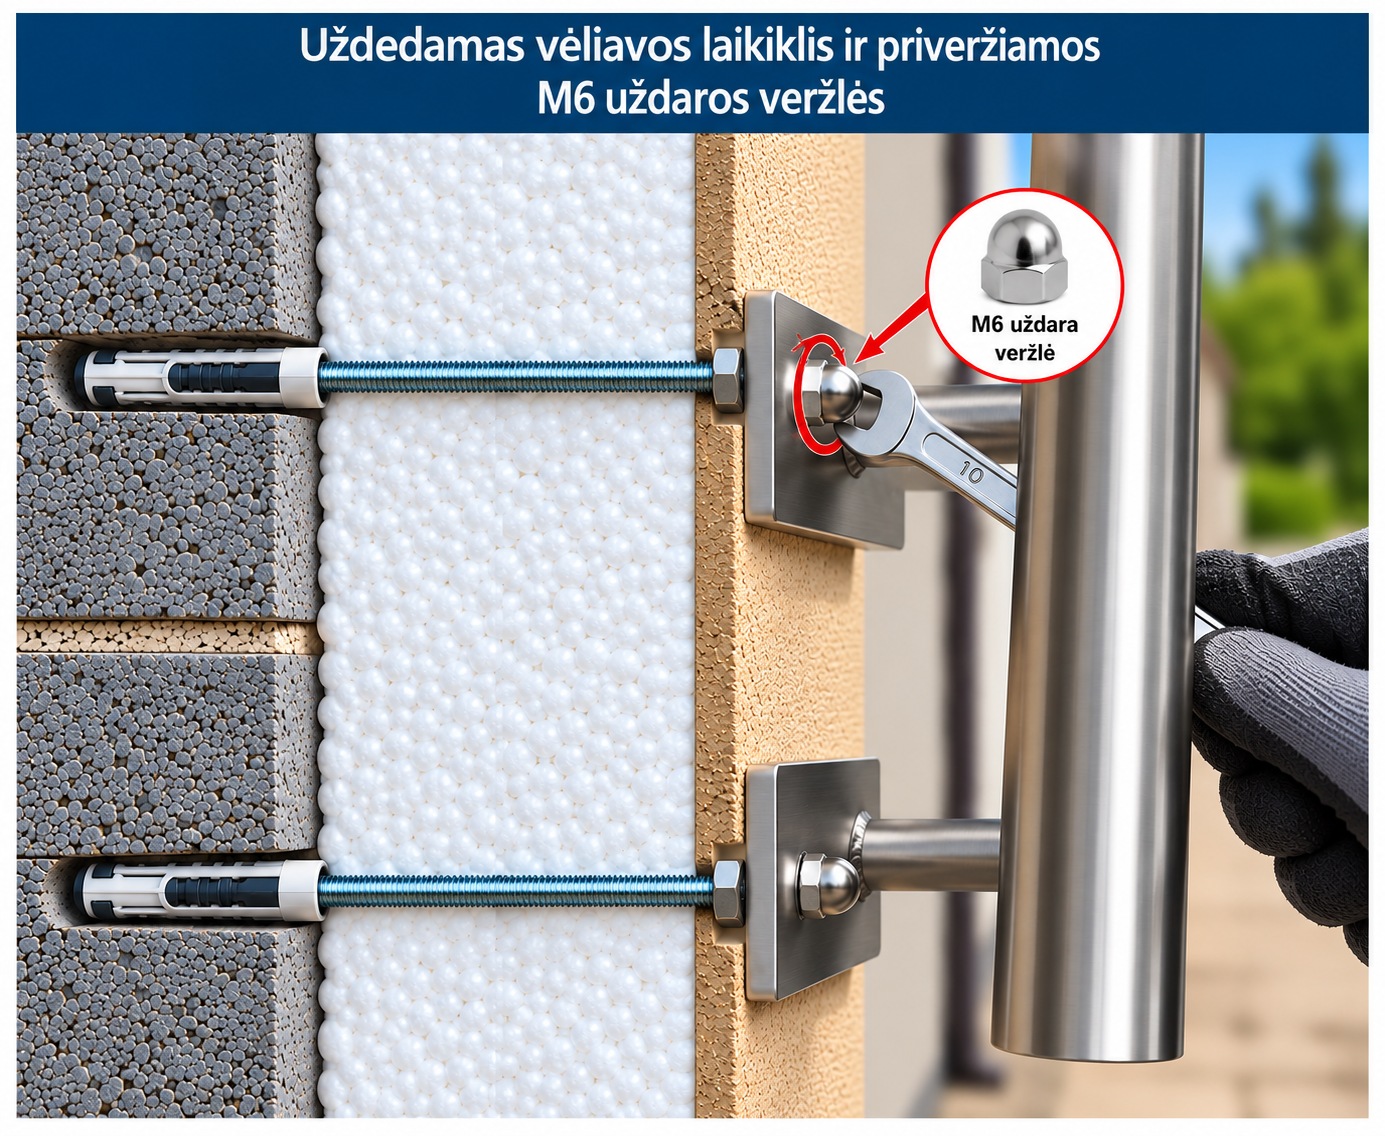
Place the holder or other element onto the prepared M6 threaded rods. Screw on the M6 cap nuts and tighten them evenly using a 10 mm spanner. The installed element should rest securely against the prepared fixing points without deforming the facade finish during tightening.
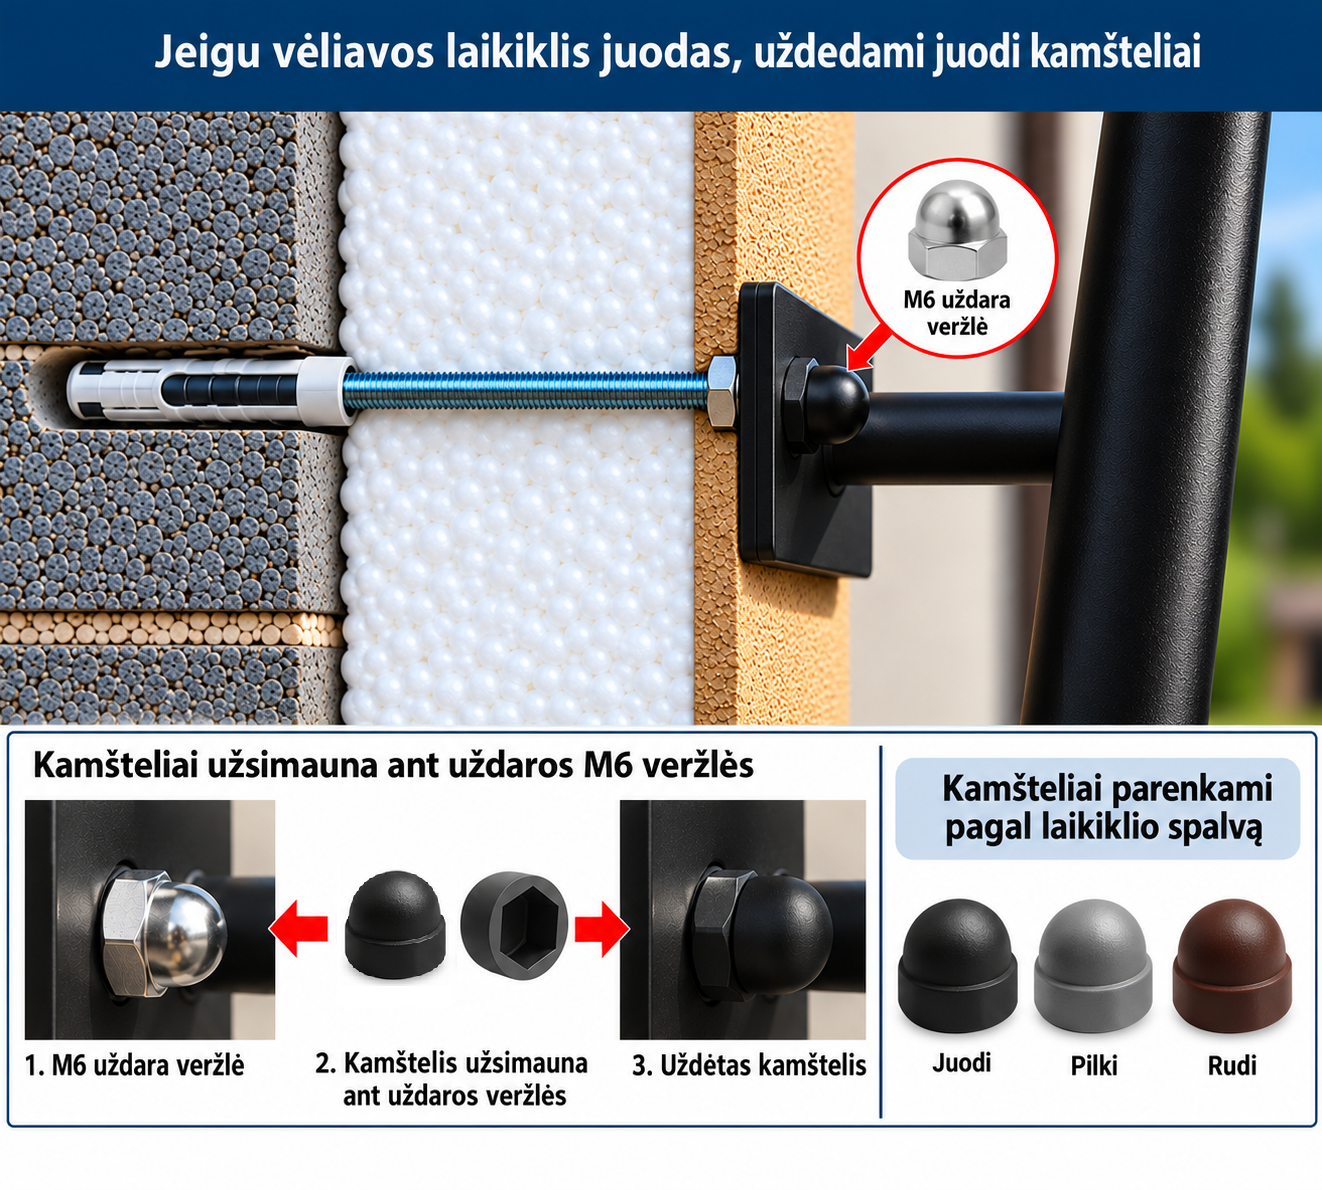
If the installed holder is painted, decorative M6 nut caps can be fitted over the M6 cap nuts. Black, grey or brown caps can be selected to match the colour of the installed element and conceal the visible stainless steel nut.
The material of the load-bearing wall, facade construction and loads acting on the installed element may vary. Before installation, make sure that the selected anchor and fixing method are suitable for the specific wall substrate and expected load. If there is any uncertainty about the wall construction or the required fixing strength, consult a qualified specialist.

